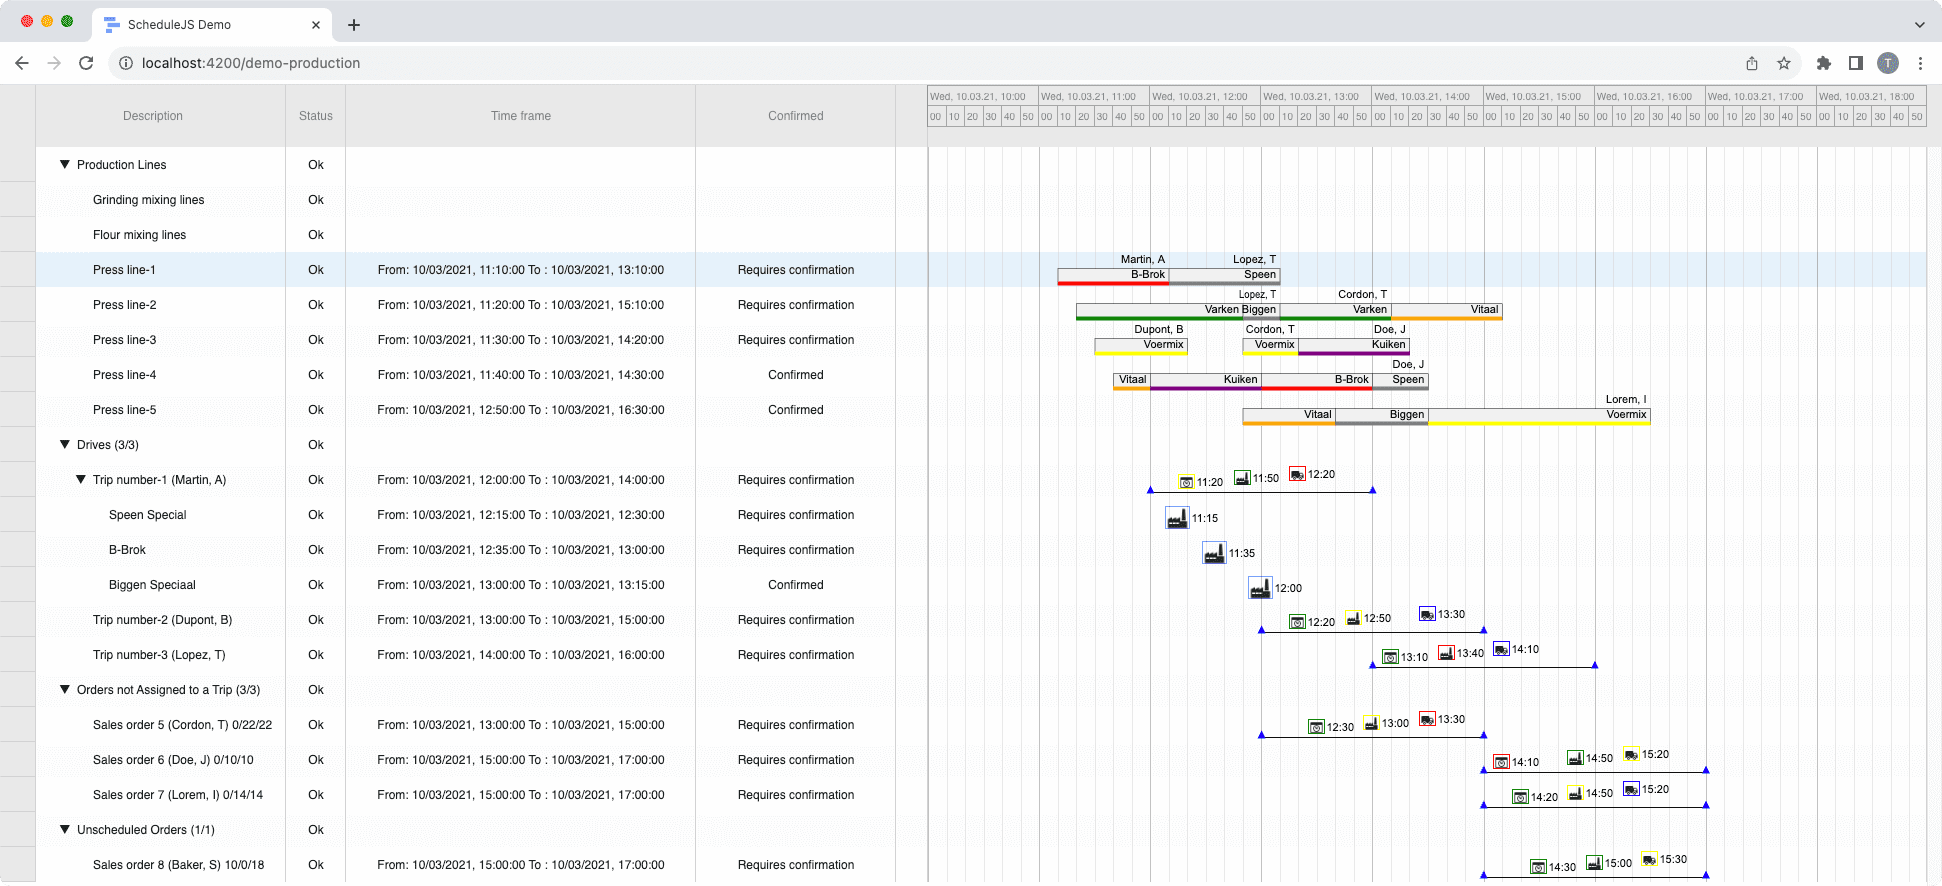
This article showcases the integration of a ScheduleJS component into an external Ag-Grid table, to demonstrate the flexibility of ScheduleJS.

Implementing a contextual menu
Generate powerful shortcuts and interactions with your graphics by creating a context menu. This article proposes a four steps implementation of a context menu system starting from scratch in your ScheduleJS graphics.
Tuesday, June 27th, 2023 - 5 minutes read
Step 1: Define your context menu structure using HTML
The first step in this tutorial is to declare your context menu in the HTML part of the application. The best way to keep your code clean is to create a dedicated component to render the context menu and define your interactions.
<!-- The ngStyle input will handle positionning -->
<div class="demo-planning-board-context-menu"
     [class.display]="!gantt.contextMenuOverlay.isHidden"
     [ngstyle]="gantt.contextMenuOverlay.position"
     (click)="gantt.contextMenuOverlay.onHide()">

  <!-- (1) Set started action -->
  <div class="demo-planning-board-context-menu-action"
       (click)="gantt.contextMenuOverlay.onSetTaskStarted()">
      Set started
  </div>

  <!-- (2) Set completed action -->
  <div class="demo-planning-board-context-menu-action"
       (click)="gantt.contextMenuOverlay.onSetActivityCompleted()">
    Set completed
  </div>

  <!-- (3) Set late action -->
  <div class="demo-planning-board-context-menu-action"
       (click)="gantt.contextMenuOverlay.onSetActivityLate()">
    Set late
  </div>

  <!-- (4) Set priority action -->
  <div class="demo-planning-board-context-menu-action"
       (click)="gantt.contextMenuOverlay.onSetActivityPriority()">
    {{ gantt.contextMenuOverlay.activity?.isHighPriority
         ? "Remove high priority" : "Set high priority" }}
  </div>

</div>
The display child class will be used to hide and show the context menu, while we will update its position using CSS and pass it through the Angular [ngStyle] input property.
Here, we created a simple contextual layout with four actions:
Set started: Change the activity state and set it as startedSet completed: Set the activity as completedSet late: Set the activity sequence as late, starting from a specific activitySet priority: Set the priority as High or remove this setting
Now let’s do a little CSS to make it pretty. We recommend using SCSS to create a scope for the style classes like the following:
.demo-planning-board-context-menu {

    display: none;
    position: absolute;
    z-index: 1;
    background: #555555dd;
    border-radius: 5px;
    padding: 3px 0;

    &.display {
      display: flex;
      flex-direction: column;
    }

    .demo-planning-board-context-menu-action {

      color: white;
      font: 13px $demo-planning-board-font;
      padding: 0 10px;
      margin: 3px 0;

      &:hover {
        color: black;
        filter: brightness(0.9);
        background: rgba(255, 255, 255, 0.4);
      }

      &:active {
        filter: brightness(0.8);
      }

    }

  }
Once done, we can start playing with Angular to create the logic for this element.
Step 2: Create an overlay abstraction
Using an object-oriented approach, we can define an abstraction that will be the starting point for all our overlays, so we can reuse it to create tooltips, modals, and such.
export abstract class PlanningBoardAbstractOverlay {

  // Attributes

  isHidden: boolean = true;
  activity: PlanningBoardActivity | undefined = undefined;
  position: PlanningBoardOverlayPosition = {};

  // Constructor

  constructor(public gantt: PlanningBoardGanttChart) { }

  // Methods

  abstract onShow(pointerEvent: PointerEvent, activity: PlanningBoardActivity | undefined): void;

  onHide(): void {
    this.isHidden = true;
  }

  setOverlayElementPosition(pointerEvent: PointerEvent): void {
    const isRight = pointerEvent.x > window.innerWidth / 2;
    const isBottom = pointerEvent.y > window.innerHeight / 2;
    const marginPx = 10;
    this.position.top = isBottom ? "auto" : pointerEvent.y + marginPx + "px";
    this.position.right = isRight ? window.innerWidth - pointerEvent.x + marginPx + "px" : "auto";
    this.position.bottom = isBottom ? window.innerHeight - pointerEvent.y + marginPx + "px" : "auto";
    this.position.left = isRight ? "auto" : pointerEvent.x + marginPx + "px";
  }

}

export interface PlanningBoardOverlayPosition {
  top?: string;
  right?: string;
  bottom?: string;
  left?: string;
}
Let’s store a few properties that will hold the state of our current overlay abstraction:
- The
isHiddenproperty will be used to hide and show the overlay. - The
activityproperty links our overlay to a specific activity. - The
positionproperty will define where the overlay should render using ourPointerEvent.
Exposing the GanttChart instance in the overlay will help us to create actions and interact with our graphics.
The overlay will also expose three methods:
- The
onShowmethod is used to define the display strategy. - The
onHidemethod. - The
setOverlayElementPositionwill update thepositionproperty.
Step 3: Build the context menu logic
Using our PlanningBoardAbstractOverlay abstract class, we can now create a new PlanningBoardContextMenuOverlay class that will hold the logic for our context menu.
export class PlanningBoardContextMenuOverlay extends PlanningBoardAbstractOverlay {

  // Methods

  onShow(pointerEvent: PointerEvent, activity: PlanningBoardActivity): void {
    if (activity) {
      this.isHidden = false;
      this.activity = activity;
      this.setOverlayElementPosition(pointerEvent);
    } else {
      this.onHide();
    }
  }

  // Context menu actions

  onSetTaskStarted(): void {
    this.activity.progressRatio = 0.01;
    this.gantt.redraw();
  }

  onSetActivityCompleted(): void {
    this.activity.progressRatio = 1;
    this.gantt.redraw();
  }

  onSetActivityLate(): void {
    this.activity.deadline = 0;
    this.activity.successorFinishesAfterDeadline = true;
    this.gantt.redraw();
  }

  onSetActivityPriority(): void {
    this.activity.isHighPriority = !this.activity.isHighPriority;
    this.gantt.redraw();
  }

}
Let’s design the onShow process:
- When opening the menu with an activity, we will store this activity and display our contextual menu. Let’s use the
setOverlayElementPositionwe created in our abstract class and give it ourPointerEvent. - If the context menu is opened without a contextual activity, we trigger the
onHidemethod.
Our four actions will update the activity data and trigger a redraw, letting our underlying ActivityRenderer update the graphics with this new information.
Step 4: Trigger the context menu
ScheduleJS proposes a large set of event methods that you can register in the main object: the GanttChart. An easy way to organize the code is to create a custom GanttChart class that extends the default GanttChart.
// Here we create our custom GanttChart class
export class PlanningBoardGanttChart extends GanttChart<PlanningBoardRow> {

  // Instantiate our PlanningBoardContextMenuOverlay class
  readonly contextMenuOverlay: PlanningBoardContextMenuOverlay = new PlanningBoardContextMenuOverlay(this);

  // The minimal GanttChart implementation requires the Angular injector
  constructor(injector: Injector) {
    super(undefined, injector);
  }

  // Event handlers [...]

}
As the GanttChart object is at the core of ScheduleJS, its class is a great place to register the default renderers, system layers, and events handlers. Note that the ScheduleJS API is accessible through the GanttChart instance with methods like gantt.getGraphics().
The GanttChart class proposes a set of overridable methods designed to handle user input on the graphics, for example:
onRowDrawingEnginePointerDownonDatelinePointerMoveonToggleGrid
What we want to do here is to override the onRowDrawingEngineContextMenu method to trigger logic when opening our context menu. In a desktop environment, this method is called when the user right-clicks anywhere on the graphics.
/**
  * Trigger when right-clicking on the canvas
  */
onRowDrawingEngineContextMenu(pointerEvent: PointerEvent, row: PlanningBoardRow, index: number): void {
  super.onRowDrawingEngineContextMenu(pointerEvent, row, index);
  const hoveredActivity = this._getHoveredActivity();
  if (hoveredActivity) {
    this.tooltipOverlay.onHide();
    this.contextMenuOverlay.onShow(pointerEvent, hoveredActivity);
    this._changeDetectorRef.detectChanges();
  }
}
Now, when the user right-clicks on the graphics, this code will trigger with the underlying pointer event, current row, and row-index. We can extract the currently hoveredActivity using the graphics.getHoveredActivity API and pass it to the overlay onShow method.
The context menu we are building will add interactions with activities present on the canvas. On user right click, we will check if we are hovering over an activity, and if it’s the case, we hide our tooltip and trigger the contextMenuOverlay.onShow method.
For performance reasons, this method is run outside of the Angular zone by ScheduleJS. So we have to add a call to ChangeDetectorRef.detectChanges() to trigger change detection manually and update the DOM.
Final result
The following video pictures the four new actions we just created:
This example is just a simple implementation of a contextual menu, the goal is to give you ideas on how you can interact with your ScheduleJS graphics. You can use the same principles to build a more advanced context menu, or even integrate a third-party library that will accelerate the contextual menu-related development stuff and trigger the ScheduleJS API from here. It’s your call!
Please nous contacter if you have any UX/UI challenges or ideas for ScheduleJS!
More Implementation-related articles

How to synchronize multiple graphics? Learn how to reuse your ScheduleJS timeline in multiple graphics to keep them synchronized.

This article shows how to implement dynamic rendering depending on the current zoom-level of the graphics.
This article proposes a step-by-step implementation of an animation mechanism using JavaScript Date API for your activities.

This article will cover a websocket implementation featuring real time data rendering using the ScheduleJS drawing engine.

This article will go through the implementation of a custom info column using an AG Grid component in place of the default one.
This article will show you how the parent-child tree Gantt architecture within the ScheduleJS Viewer was built.
This article will showcase how the main activity renderer of the ScheduleJS Viewer was built with code examples.

ScheduleJS allows you to build complex drag-and-drop interactions, including side effects. This article shows how to implement drag-and-drop.
S’abonner
Connexion
0 Commentaires
Commentaires
Show all comments
